Making an HDR Image
I've had a few people ask lately about how I make an HDR image, so i thought I'd share my non-rocket science, wizard-behind-the-curtain technique on a couple images from a recent wedding I photographed.
First off, some of you out there may be asking, 'What in the world is an HDR image?'. HDR stands for High Dynamic Range image, which - when you really boil it down - means an image with a whole lotta detail. Typically in digital photography one thing that's become a little more difficult is achieving details in both the highlight and shadow areas of a single image. Digital just doesn't have the same latitude and forgiveness that good ol' fashion film does, so you actually need to be more accurate with your exposures in the camera. Even then, there's just some images you're not going to be able to get all the detail you want because of the range of dark to light areas your trying to capture. That's where HDR comes in.
There's several different ways to create an HDR image, but basically they all involve combining multiple exposures into one image. Some people will bracket an image, meaning they'll shoot the same scene at several different exposures and then combine those images in post-processing. I've done this and it works pretty well if you're subjects don't move and you've got a tripod. However, this method doesn't work so well when shooting people because unfortunately they have a tendency to not be able to hold an exact position for a couple seconds. So, what I do in that case is shoot one image in RAW format and then in Lightroom (or Adobe Bridge or whatever your flavor of choice is for RAW image processing) I create multiple versions of that image with different exposure values, a couple increments over exposed to get those shadow details and a couple increments under exposed to get those highlight details.
Then, because Photoshop - as awesome as it is - does a fairly lousy job of creating HDR images with it's "merge to HDR" feature (even the guys at Adobe will tell you it's less than stellar), I use a crafty third party app called Photomatix Pro to combine all those exposures into one image. What's great about Photomatix Pro ($99) is that it's got a simple clean interface and still allows you lots of control to make tweaks to the resulting image.
Here's a couple samples of HDR images I created using the above process.
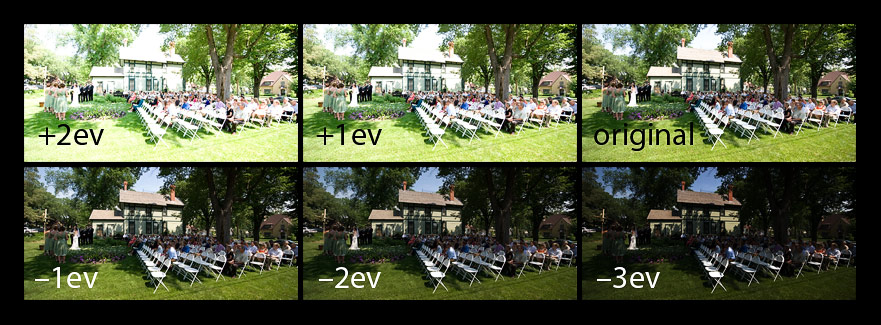
|
| 6 exposures generated from 1 RAW file.
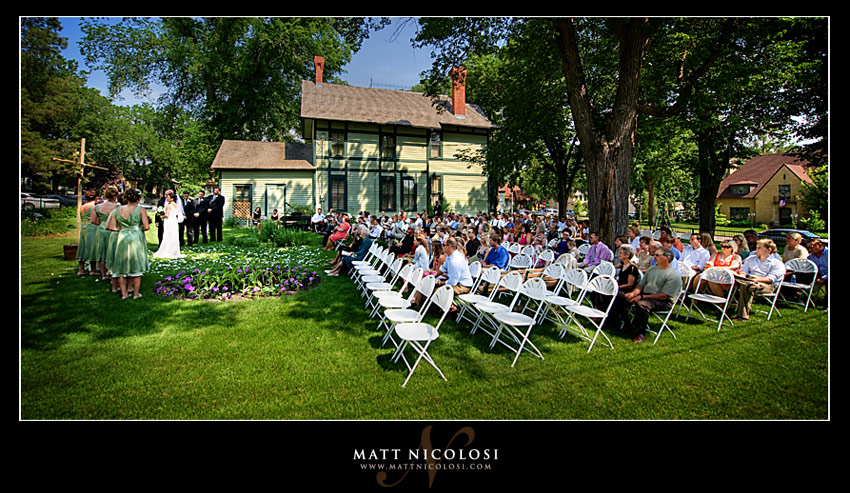
|
| Resulting HDR image. Notice the details in the shadows and highlight areas.
|
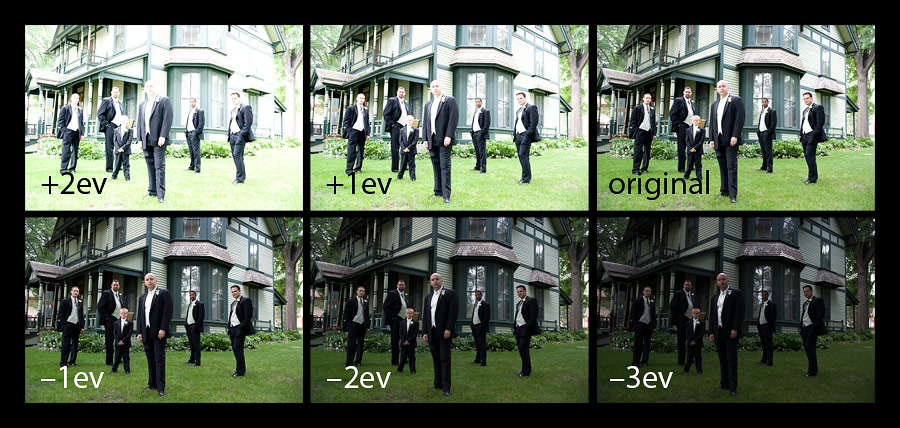
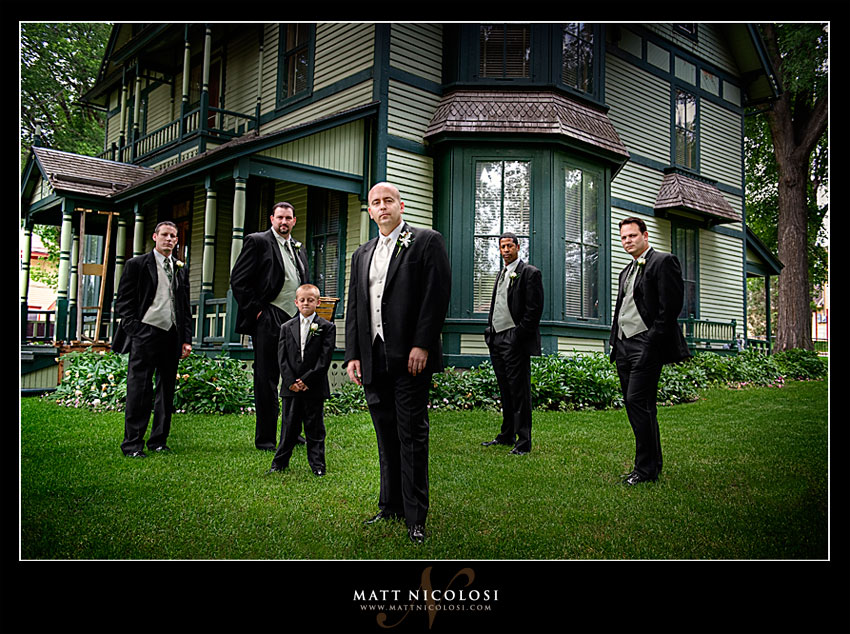
| 6 exposures generated from 1 RAW file.
|
| Resulting HDR image. I know it's kinda hard to tell in this smaller image, but in the full resolution image, there's tons of detail in this image.
|